

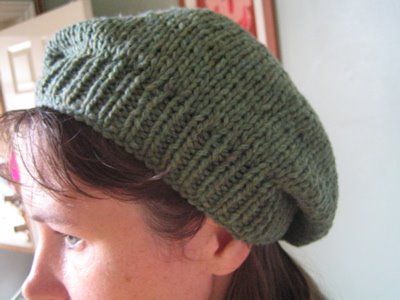
This winter, it seems like everyone will stylishly sport the 1930s knitted beret (that's Joan Crawford in 1928 by the way).
Here's a very simple and rapidly-made beret in a chunky knit. I used Rowan Cork (thank you Bryony!) which is chunky without being bulky and therefore a good choice, especially if you like to see the stitch definition to add to that 1930s feel. It's knit flat rather than in the round (1930s style...), but the joined seam is hidden in the pattern made by the increases.

50g Rowan Tweed (I've used Ivy), one pair of 8mm straight needles, one pair of 5mm straight needles, a tapestry needle.
Gauge is not too critical, but if you knit very tightly and/or have a big head, you may prefer to use 6mm needles for the rib.
Cast on 3 stitches
Purl all odd rows through rows 1 - 21
Row 2: knit, increasing in every stitch (6 sts)
Row 4: knit, increasing in every stitch (12 sts)
Row 6: K1, increase in next stitch, repeat to end (18 sts)
Row 8: K1, increase in next stitch, repeat to end (27 sts)
Row 10: K2, increase in next stitch, repeat to end (36 sts)
Row 12: K3, increase in next stitch, repeat to end (45 sts)
Row 14: K4, increase in next stitch, repeat to end (54 sts)
Row 16: K5, increase in next stitch, repeat to end (63 sts)
Row 18: K6, increase in next stitch, repeat to end (72 sts)
Row 20: K7, increase in next stitch, repeat to end (81 sts)
Row 22: K8, increase in next stitch, repeat to end (90 sts)
Work 9 rows in stocking stitch, ending on a purl row
Row 32: K8, K2tog, repeat to end (81 sts)
Work 9 rows in stocking stitch, ending on a purl row
Change to 5mm needles and work 9 rows K1 P1 rib
Cast off, leaving a long tail (40cm) to sew up.
Pin right sides together and sew up back seam. Finish in ends.
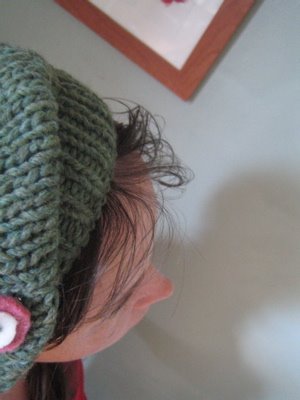
I found it looked best with a brooch pinning the crown to the rib to make it sit gracefully asymetrical.
This is an offering for Whiplash, in the tutorial category.

posted by Petulant at 5:46 pm
![]()

15 Comments:
this is SO cool, i´ll be sure to make one!
thanks for the tute!
great! i want one too! thanks for sharing :)
Very nice. I will have to try that. Do you think dpns will work?
Oh how lovely, I will have a go at that at some point. Beautiful colour too.
Great tutorial, I love it!
I have been lusting after a beret and really prefer yours to the other pattern I have printed out. Thanks.
does anyone know exactly what kind of increase to do in this beret?
KFB is the best increase for this pattern.
how much yarn did you need?
So I'm on my third hat. So fast and easy, and the finished project looks gorgeous. As a pretty new knitter, I have to say that this pattern is perfect for where my skills currently are. Two thumbs up!
hello i am hopeful~~ is this beret knitted flat or are the smaller straight needles dpn s ? how much yarn? would i ball of worsted #4 80 grams x 2 work?
anaymous gmail barbbfly2009@gmail.com
I'm very excited about knitting this hat but I'm a bit stumped. You say you knit hat with Rowan Cork, but in the pattern instructions you call for Rowan Tweed. I'm confused about what kind of yarn to use. Can you clarify?
Thanks for great pattern!
Super artykuł. Pozdrawiam serdecznie.
Don’t enjoy knitting in the round so great to see this, many thanks.
Post a Comment
<< Home